
The Stats
- Serves: 4-5
- Prep Time: 5-10 min.
- Cook Time: 15-30 min.
The Cook’s Tour
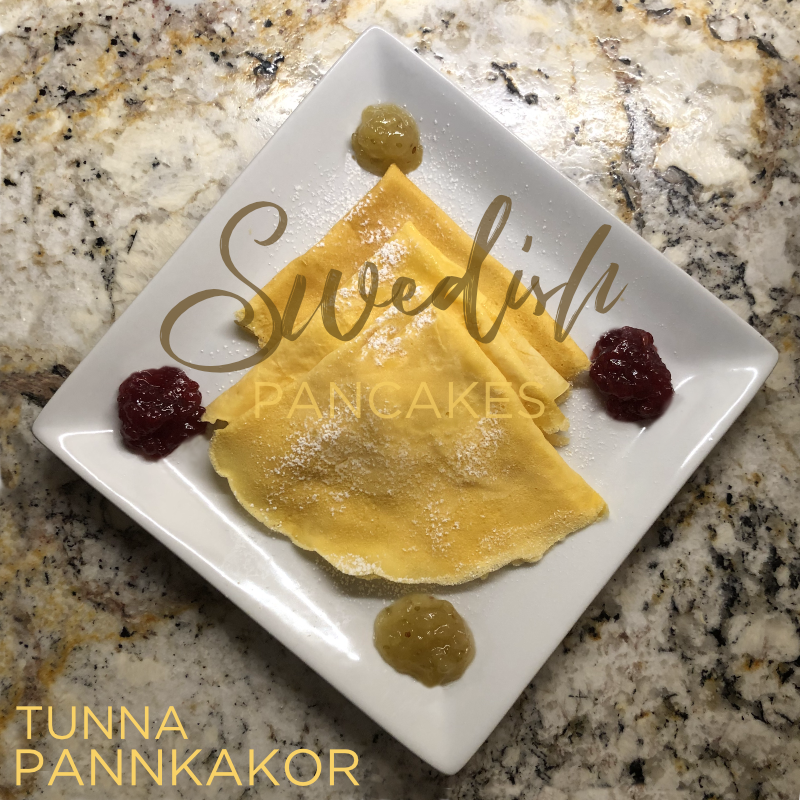
If you’ve had “Swedish” pancakes at some Hoppy-Slammy pancakeria, then you’ve never had tunna pannkakor (thin pancakes), aka “Swedish” pancakes.
Swedish pancakes are, to French crepes, what Beluga caviar is to cheaper lumpfish, with no apologies to my French readers. The modern crepe, which, is more Mexican tortilla than what it was before it became France’s answer to the sandwich. Most creperies do not bother with a stand-alone “dessert” crepe, closer, albeit still thicker, to its Swedish cousin
I love tunna pannkakor’s more lower gluten, more delicate, lower-gluten, eggy, edge. Definitely NOT built to wrap, they’re best enjoyed within a few minutes of making.
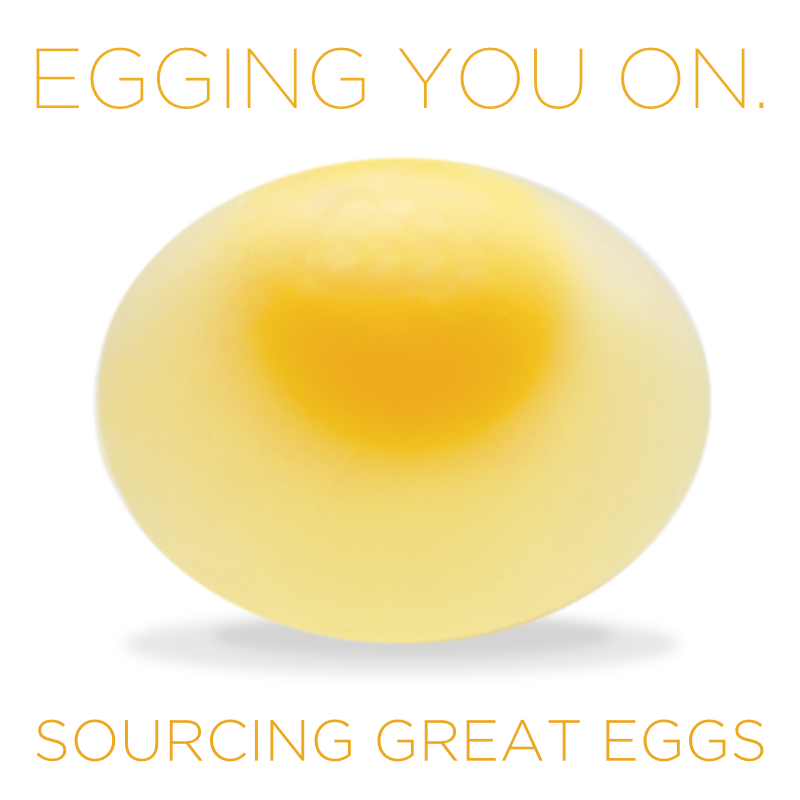
It’s all about the eggs.
Which means that EGGS MATTER in this recipe. Use third-rate eggs? Get third-rate thin pancakes. Even in Europe, where eggs used to be sacred, factory farming is demolishing their nutrition, color, and flavor.
Pasture-raised eggs, from hens truly allowed to roam free?
Good.
Heritage breed hens, that aren’t the anemic factory birds?
Even better.
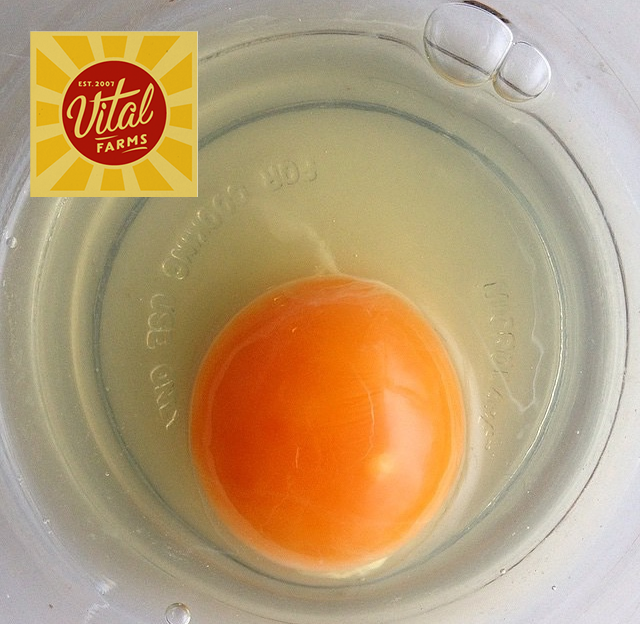
Eggs are very regional. Even US national brands like Vital Farms are a collective of family farms. Here in sunny Florida, they’ve contracted with farmers whose hens produce a much more pale, factory-looking egg than you could get in say, Texas, or Georgia. Locally, we use the Happy Egg Co.’s Heritage Breed eggs.
More expensive? Yep.
Worth it for recipes like this?
Look at the color of the pancakes in the photos!
Too much work?
Thin pancakes aren’t that hard to make, once you get the hang of it. The batter, in the blender is the easy part. Using a squeeze bottle, a happy little cheat, makes them much easier to pour onto a griddle.
I’ve included the pan version for purists, and other masochists.
If you’ve made crepes, you’re off to a good start, but you’re going to do some different things, with the thinner batter, and lower heat, that will offer a few teachable moments in adjusting to the texture, and thickness differences between a crepe and a Swedish “thin” pancake.
The Gear
- Crepe maker, griddle, or 35 cm – 38 cm – 14-15” nonstick pan
- Thermapen, or other digital thermometer;
- Vitamix® blender, or bowl/whisk;
- Crepe T-stick;
- 12” long icing spreader;
- Turner;
- Pourable container, or measuring cup;
- 4-8 oz. plastic squeeze bottle, with a narrow spout;
- Silicone funnel;
- 2 oz. ladle;
- 2 – 2 oz. ramekins;
- 1 – 4 oz. ramekin;
- Plastic wrap;
- Paper towels.
Also Handy
- Warming oven, or warm oven, to keep your pancakes while making more.
The Stuff
The Wet Stuff
- 5 Vital Farms pasture raised eggs;
- 600 ml / 2.5 c. whole milk;
- 9 ml / 2 tsp. La Tourangelle hazelnut oil
The Flavorants
- 2g Sherpa Pink Himalayan salt;
- Small pinch (a few grains) mace, or nutmeg;
- Drop of Heilala bourbon vanilla extract
The Dry Stuff
- 150 g. / 1.25 c. All-purpose (soft) flour;
- 25 g. / 2 tbsp. Kirkland organic cane sugar;
The Unsticking Stuff
- Avocado oil, for the crepe maker, griddle, or pan.
The Extra Stuff
Toppings! If you want to go legit, you’ll have:
The Steps
Kick (Down) the Heat
For Swedish pancakes, my crepe-o-philes, we keep the temperature DOWN. So set your cooking surface of choice to 52°c / 225°F. Use your Thermapen, or other accurate thermometer. Don’t trust the dial on your crepe maker, griddle, or stove. They’re seldom right. Just LIGHTLY touch the Thermapen needle to the surface to get the read.
Batter Up!
We’re making a batter, thin on flour, and heavy on egg. Swedish pancakes are light, delicate, wonderful things. Nothing like the version sold at American hash-houses that should be arrested by the Swedish Culinary Police for calling their rubbery wannabes “Swedish.”
This is the exception to the “less is more” rule: Rapid integration helps this batter form better. So, unlike a hand-mixed American pancake, we need to coax the gluten, and the eggs, into total harmony.
A blender is best for this mission. You can use a food processor, or, if your Apple Watch, or FitBit, needs you to burn a few more cals/kcals, then HEY! Grab a bowl, and a whisk, and knock yourself out!
Blender: Ready
- Set up your blender.
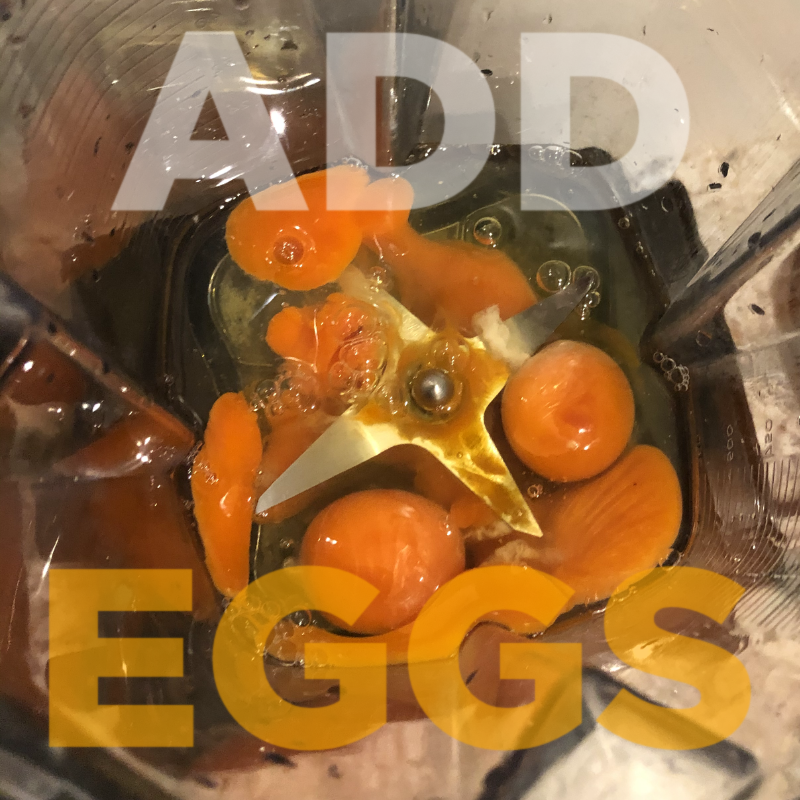
- Add the eggs to the blender, or work bowl;
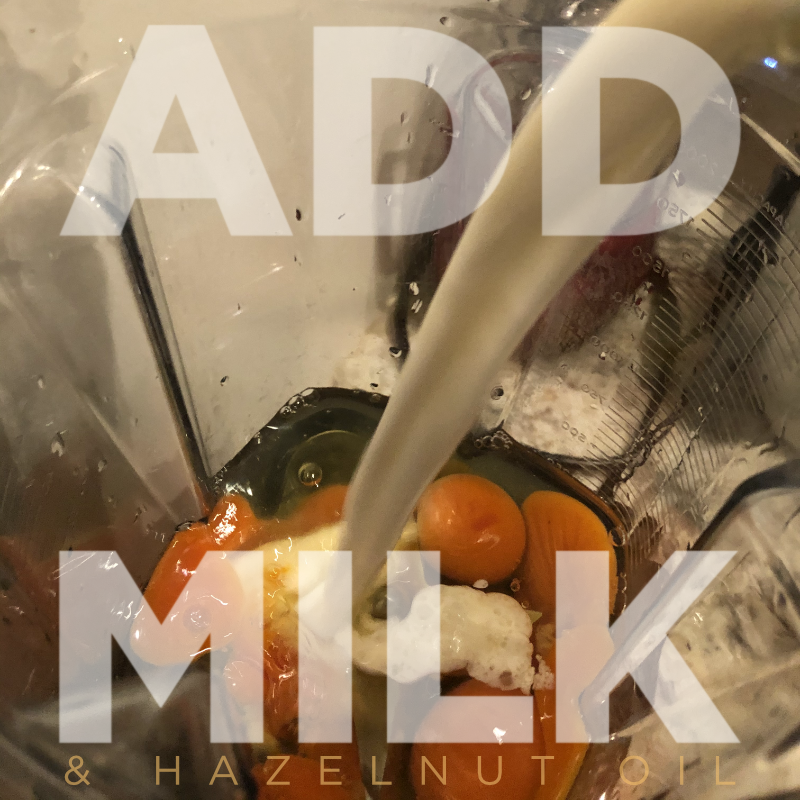
- Tare/Zero your scale with the pourable container/measuring cup. Set to ml (milliliters) Put in the milk, and the oil into the blender;
- Tip: Best not to add the milk and il directly to the blender, even if you’ve put it on the scale, and zeroed it out, as it’s hard to correct for accidental overages of ingredients, once the eggs are added.
- Add your flavorants: The pinch of salt; a drop of vanilla; and the TINIEST pinch of mace†.
† See the photo below. Just a few grains. It’s VERY strong. You can substitute ground nutmeg. Add a bit more of that, but not much. We’re looking for hints of flavor/aroma.

- Add the Dry Stuff: Flour, and cane sugar.
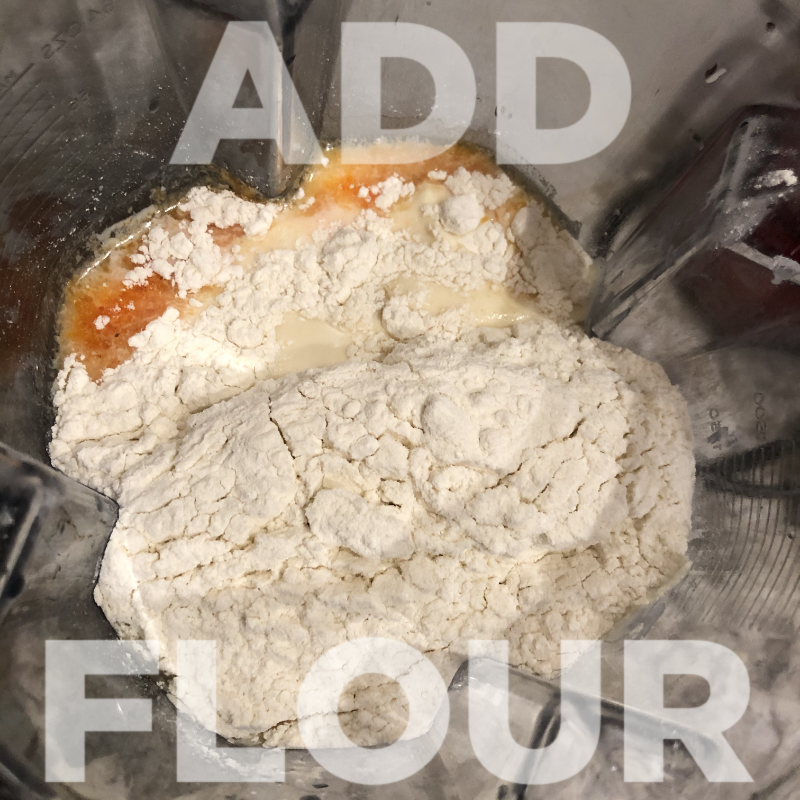
- Blend at the LOWEST SPEED for about 25 seconds, or until fully integrated.
- Pour some into a squeeze bottle with a control nozzle (The hole is small enough to not have everything rush out of the bottle when turned upside down).
- Put the ladle into the blender.
- Place both near the crepe maker/griddle or pan.
Topping Prep
- Put your lingonberry, and gooseberry preserves into ramekins. Cover with plastic wrap, until ready to use.
- Make your Atlas Never-Whipped Whipped Cream:

- Put some of the whipped cream into the ramekin. Smooth with a spoon, or butter knife. Put the remainder into a storage container. Put both into the refrigerator, until needed.
Now, let’s move on to the show!
The Cook
Griddle Method (Preferred)
This is very thin batter that we’re working with. It’s not going to puddle perfectly, like an American pancake, or have the viscosity (thickness) to support the easy-glide spreading that you get with a French crepe on T-spreader.
- Pour a bit of avocado oil on to the grill. Wipe with a paper towel evenly around the surface.
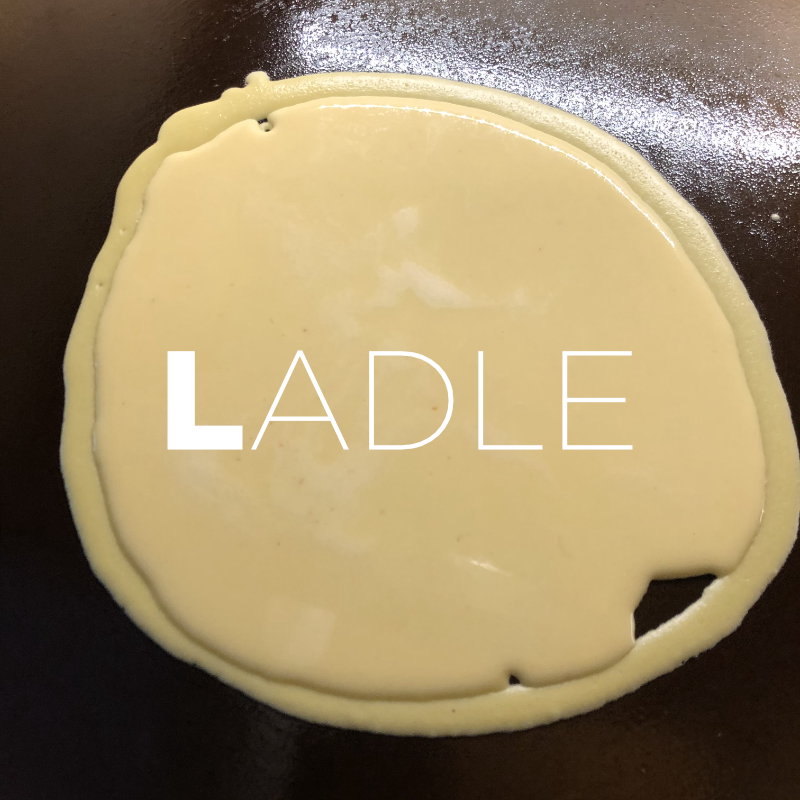
- Using your squeeze bottle, filled with batter. to lay down a loop on the griddle to make a base form.

- Wait a few seconds, and then use your 2 oz. ladle to pour batter into the center of the “target.”
- Immediately pick up your “T” spreader. Spread the hardening batter in a circle, quickly, so it spreads outside of your circle. Swedish pancakes have an irregular edge.
- Rinse off the T-spreader and return to its place next to the cooking surface. Do this after each pancake. A clean spreader prevents tearing.
- Allow to cook for 1-2 minutes, until firm.

- Carefully slide the icing spreader under the pancake. If you meet with resistance, try another spot, or pull back from where you are, and slide around until the whole thing is loose. We don’t want to tear the pancake.

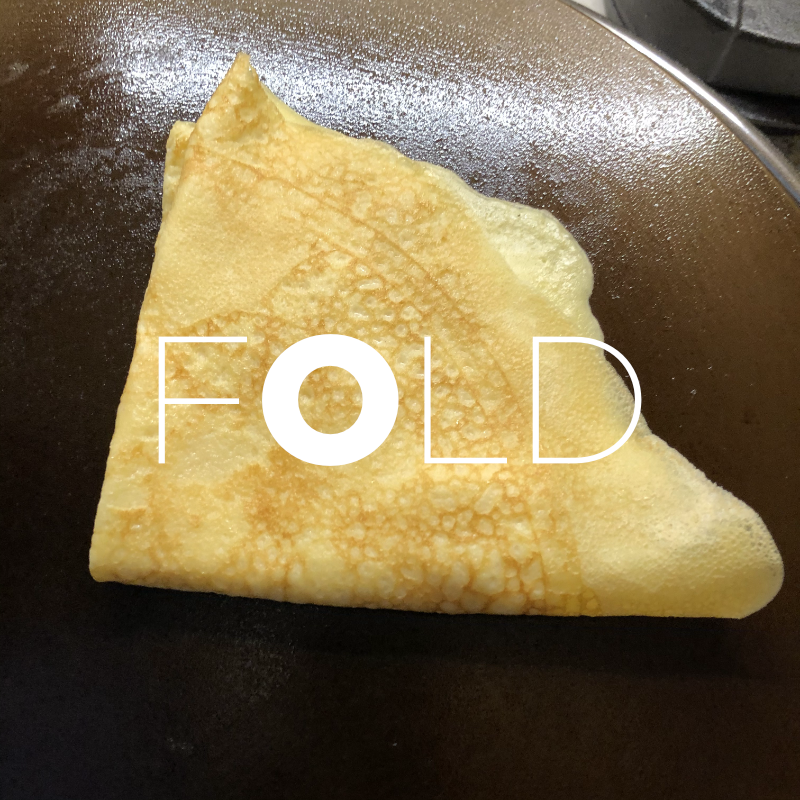
- Using the spreader, or a turner, flip the pancake for about 10-15 seconds. Then flip back;
- Using the spreader, fold in half, then fold again into a quarter. Use the spreader or a turner to pick it up, and put it on the plate.
- If you have a warmer, put the plate into it. If you don’t, quick heat the oven for about 4 minutes at its lowest setting, then turn off. Keep the pancakes, on the plate(s).
- When you have enough pancakes, dust them with powdered sugar;
- Put dollops of gooseberry, and lingonberry on the corners;
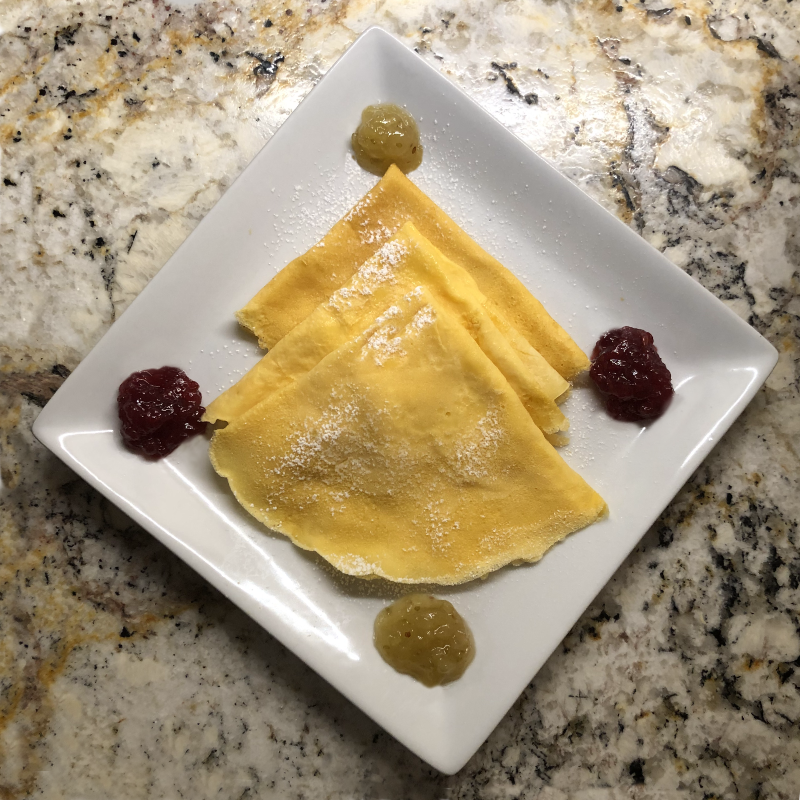
- Put a dollop of the extra-firm Atlas Never Whipped Cream on the corner of the plate.
- Serve.
Pan Method
- Spray or wipe some avocado oil into the nonstick pan on medium-low (225°F) heat.
- Pour a ladle of the batter into the pan;
- Tilt the pan until the batter makes a thin coat to the edges;
- Allow to dry enough that you can get a silicone spatula under it;
- Working around the edges with the spatula, get under the pancake. It’s a bit trickier with the higher edge, which is why I’m less in love with this method for most home chefs. When it’s completely off of the surface, fold, and plate.
- Follow the directions for griddling to keep warm/plate/serve.


