


There are crumpet people and there are English muffin people. I count myself amongst the crumpet-crazy! I like the more defined holes that hide all of the bad-for-you-goodness of butter, and jam.
It’s also a texture thing. English muffins are a bit coarse. Crumpets are a little softer, not as chewy. They’re British, legit, smooth, and elegant, like a James Bond opening line.
Just toast and eat them with a little butter on the top. They keep well in the fridge, so you have a snack or breakfast item that’s tasty and thrifty too!
I provide the American cup measurements, but a good scale and correct metric measure is always better in baking.
TEACHABLE MOMENTS
Griddle Breads
Crumpets, and “English Muffins,” their sort of bastardized crumpet-cousins, that are hard-baked on both sides, are both griddle breads. The yeast lets them rise. Crumpets are a bit thinner batter, more like a pancake. That also lets them open up more of those wonderful holes. The thing that separates them from pancakes are that they are a yeast-raised bread, not really a batter.
Yeast’s a Beast
We’re taught to fear bacteria like the 21st c. germaphobes that we’ve all become.
There are good bacteria, and BAD bacteria. Bacteria is essential to your existence. Your gut is populated with it. You wouldn’t be able to digest your food without it.
Basically, you’re feeding it to feed you. Put it in flour, and it snacks away on the sugars in the flour, plus any that you’ve added in. When it “burps,” it creates gasses that get trapped in the dough, and cause it to rise.
Yeast is one of the most powerfully positive bacteria in your culinary arsenal. You can use dried, or you can create your own starter, literally out of thin air. (See my starter recipe for breads.)
Read up more on yeast in my how-tos, to learn more about how to use it, and control the beast!
USE THE SCALE
(TRUST THE MATH FORCE, LUKE…)

Want to cut the recipe down by a third? 355g *.33 = 117.5g.
How many cups is that?
Beats me.
Scales measure MORE ACCURATELY than our kitchen cups. Some measuring cups can be off by quite a bit, which affects the recipe.
Working in units based in 10s are much easier to deal with than all of the backflips we do for the King’s cups.
Turn your scale on. Make sure it is set to grams.
Temper, temper, Temperature
Water Temp
In bread recipes, temperature is important. Baking on a warm summer day, or a cold one, affects the conditions in which the yeast do their dining on the foods in which you use them. You want your yeast happy? They do ideally well to start multiplying at 26°c / 79°F. Fermentation, not that we’re doing that here, is slightly higher, at 35°c / 95°F.
So we’re better off, here with hot kitchen sink water (37-40°c / 105-115°F). It will cool a bit in the mix with the other ingredients.
Air Temp
When proofing, if it’s 75-80°F if you don’t have a proof setting, that gets your oven to about 25-29°c / 80-85°F, turn on the oven at its lowest setting for about two to three minutes, and then turn off. Stick your Thermapen into the oven to see if it’s the right air temp.
Don’t put your proofing bowl on too hot of a wire rack or it will cook it. Cool that first, before using.
Griddle Temp
Test your griddle before doing this. Get it up to 149°c / 300°F. Tap the Thermapen to it. Is it correct? If not, adjust the temperature and mark, on your unit, where the correct temperature is on the knob/dial, or note the number if it’s digital. Contact the manufacturer if it is significantly off.
SERVES:
Makes 14-16, depending upon the size of the griddle rings used.
MISE EN PLACE
- Kitchenaid Tilt Mixer & Work Bowl ;
- GVODE flat beater attachment with scraper for KitchenAid Tilt Mixer;
- Nonstick griddle or crepe griddle or large nonstick pan or crepe plate;
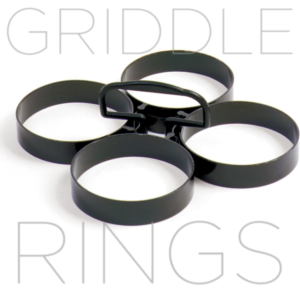
- Four English Muffin Rings †, preferably non-stick;
- Kitchenaid Mixer with flat beater or beater/scraper attachment & work bowl;
- Large plate for cooling;
- Mini prep bowl;
- Silicone spatula;
- Thermapen Mark IV or digital thermometer;
- Liquid measuring cup;
- Simple Industrial Grade Kitchen towel;
- 2 oz. ladle;
- Scale;
- Spoons;
- Table knife;
- Tongs.
INGREDIENTS
Mixer Work Bowl
- 355g / 2c King Arthur All-Purpose Flour
- 55g / 0.5 Hoosier Hill dry powdered nonfat milk;
- 6g / 1 tsp Himalyan Pink salt, or other salt;
- 9g / 2-1/4 tsp Bob’s Red Mill rapid rise yeast or 1 package rapid rise yeast.
Measuring Cup
- 355 ml / 1.25 cup hot water at 26°c / 79°F
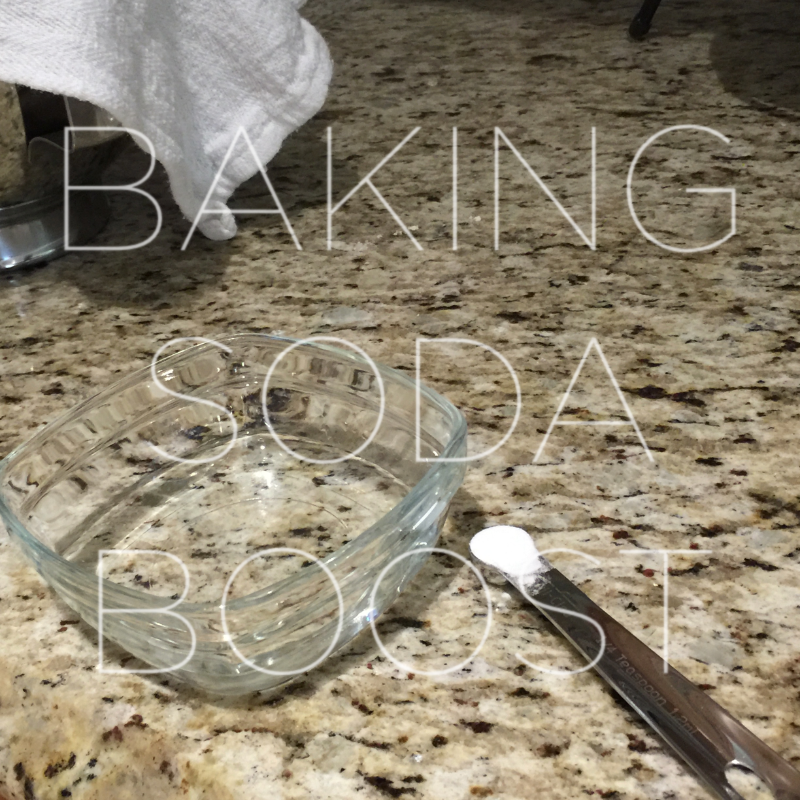
Glass mini-prep bowl after batter rising, BEFORE cooking
- 1.42 g / 1/4 tsp Bob’s Red Mill baking soda
- 59 ml /1/4 cup cold water
- 60ml / 1/4 cup egg white or 1 egg white beaten.
During the griddling
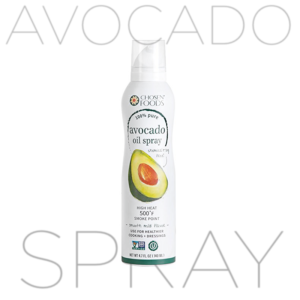
- Avocado oil baking spray or Baker’s Magic spray (See article on Avocado Oils. Do not use Pam, Crisco, etc. Low-temp sprays burn, become toxic, AND change the taste.)
THE STEPS
- Place the work bowl onto a scale and hit the TARE button to zero out the weight of the container. Add the first ingredient. Repeat for each one.
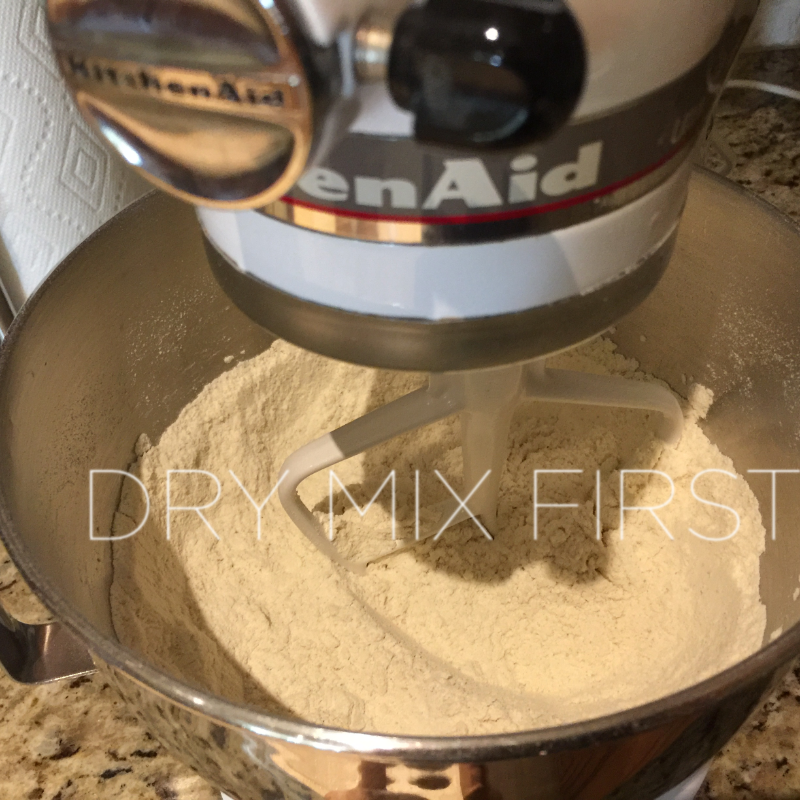
- Measure the flour, yeast, salt and the nonfat dry milk powder into the work bowl by weight.
- Place the mixing bowl into the mixer’s stand.
- Attach the flat beater.
- Mix the dry ingredients thoroughly with a flat beater for 1 minute at low speed to distribute evenly.
- Put your pourable liquids cup on the scale. Tare it to deduct its weight from your calculation. Remove it from the scale and take it to your water faucet.
- Run your hot water for a bit to warm it up.
- Read the temperature, using your digital thermometer, in the middle of the water, not touching the glass/plastic, it should read 26°c / 79°F. Temperature counts with yeast.
- Not hot enough? Let the water run a bit hotter;
- Too hot? Add a little cold water.
- Adjust the volume to 355ml / 1.5 cups
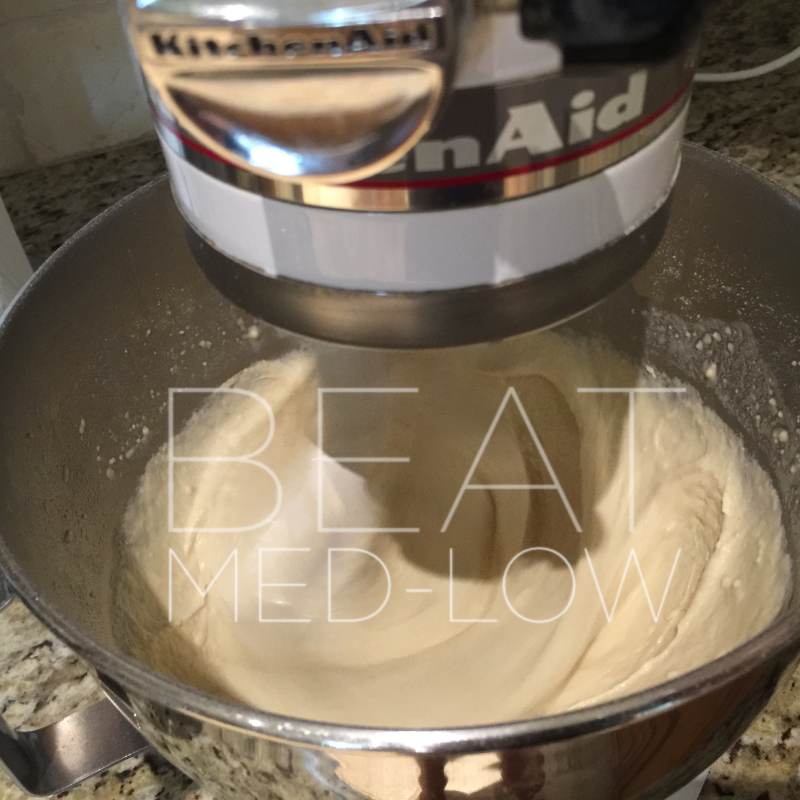
- Mix the batter in your mixing bowl for three (3) minutes, or, by hand, five (5) minutes, starting at the lowest speed to integrate and increasing speed to low, 2-3, on the mixer. DO NOT OVERMIX.
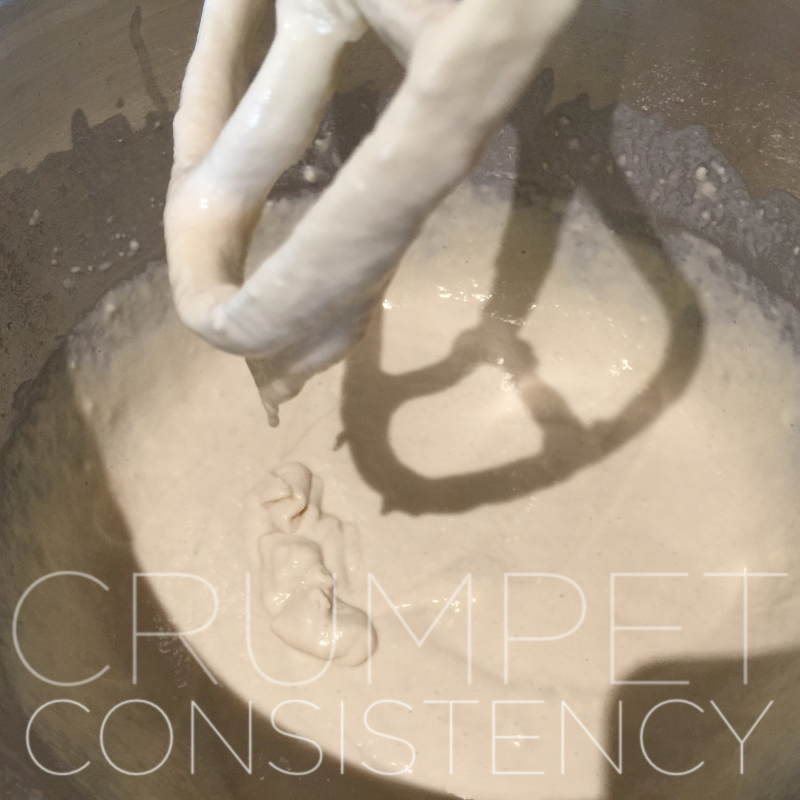
- This is a wet dough, more like a batter. When finished, it should have the consistency in the photo. If it’s too thick, you can see the bottom of the mixer, add a few drops of water until it thins a bit.
- When finished, remove the beater blade and scrape any excess off of it into the bowl with a spatula.
- Scrape down the sides of the bowl, if necessary.
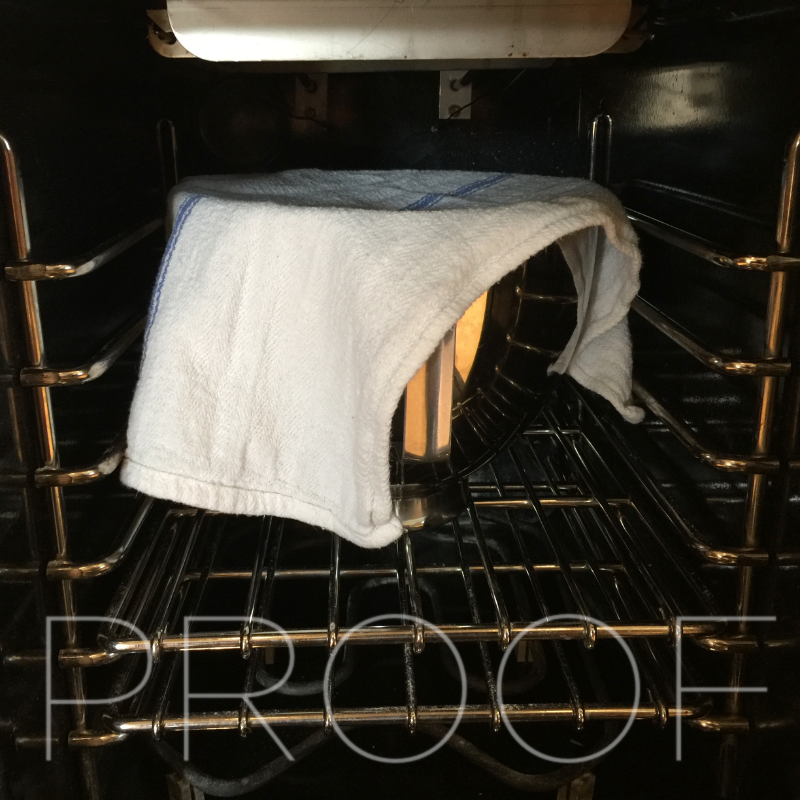
- Cover with a kitchen towel, and place work bowl in a draft-free, warmer place, 24°c – 27°c / 75°-80°F.
- On a warm day, any kitchen counter will do.
- On a colder fall/winter/spring day, measure the air temp of your oven with your thermometer. Not 24°c/75°F? Put into your oven and…
- If your oven has a proof setting, set it to PROOF.
- For ovens without a proof setting:
- Take out the covered mixing bowl;
- Turn on the heat for one minute to the lowest setting, and turn off the oven;
- Wait a minute for the heating units to cool, and then test with your thermometer. If it’s between to 70-85°F that’s great! Put the covered mixing bowl back into the oven, and leave it there with the oven OFF.
- Set a timer for 30 minutes, and a second timer for 20 minutes.
- Pre-heat your griddle or non-stick cooking surface to 150°c / 300°F (If you have an adjustable temp griddle, or a stove-based one, 138°c / 280°F is optimal and can be checked with a digital thermometer by gently touching it to the surface so you don’t scratch your griddle, or pan).
- When the 20 minute timer is done:
- Put your mini work bowl onto the scale. TARE it.
- Separate an egg white, or add the liquid egg white to the mini-prep bowl. TARE it.
- Add the cold water and the baking soda to the mini prep bowl.
- Using a mini-whisk or a fork, combine ingredients;
- Set aside.
- After the 30 minute timer is done, check the batter to see that it has doubled in volume.
- Yes? Go to the next step.
- Not ready yet? Wait a bit more. If it doesn’t double, you may have old or largely dead yeast. You can stir some fresh yeast into 30 ml / 2 tbsp of water, and then gently fold in. Don’t mix vigorously, it breaks down the structures of the dough.
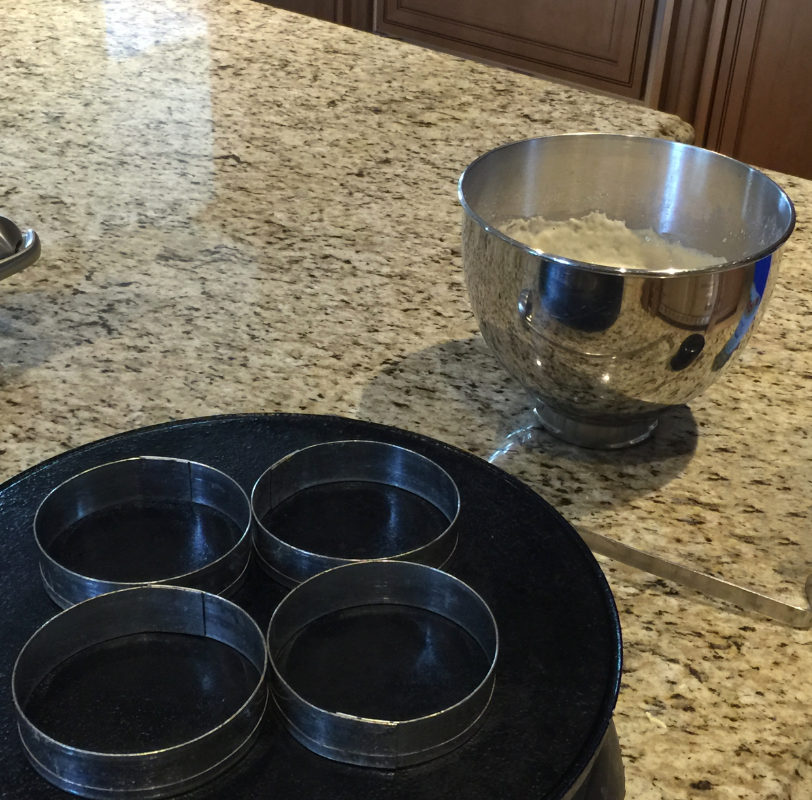
- Put clean rings (washed and dried if it’s your first use) on the griddle. Have the avocado oil spray and tongs, ladle at the ready.
- Pull out the proofing dough:
- Remove the towel cover;
- Using your spatula, gently fold (turn) the egg white, water, and baking soda into the mix. DO NOT stir aggressively as this will break down the risen dough. Make sure the liquids integrate by lifting from the bottom with your spatula and folding in inside to outside, outside to inside.
- Spray each ring’s inner sides and the bottom of the ring with the avocado oil spray.
- Ladle in dough, enough to fill 1/2 of the height of a 19 mm / 3/4” English muffin ring. It will rise up to about 1/2 to 2/3rds high. Do not overfill!
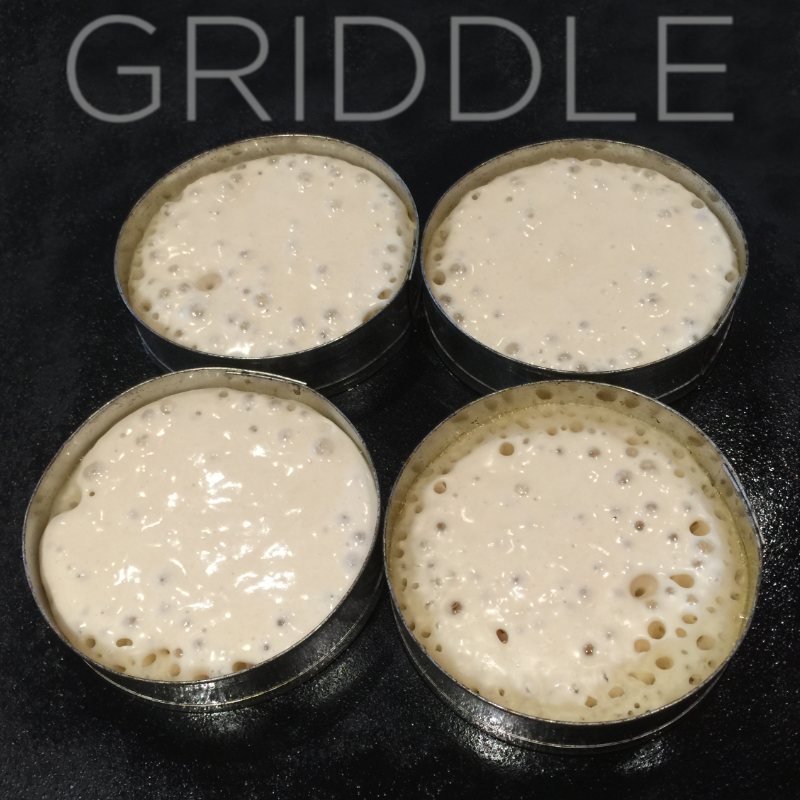
- The crumpet will cook nearly through after a few minutes. Holes will form on the top as it rises but it is nearly fully cooked.
- Using your tongs, remove the mold as the dough pulls away from it, and set aside for the next use. If it sticks a bit, use a regular table knife, run around the inner edge, between metal and crumpet, to separate out anything that sticks.
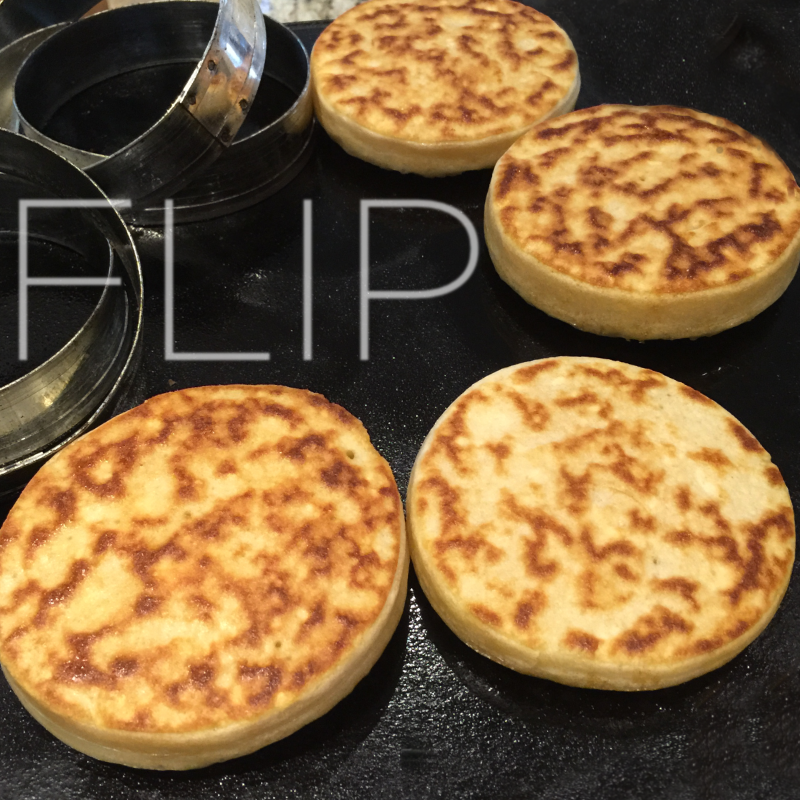
- Flip it over for just a moment (5-7 seconds) to cook the dough on top. Do not leave too long or the top will seal like an English muffin.
Remove from the heat to a cooling plate. - Inspect the batch. If the bottoms are too dark on the first try, reduce the heat. They should be light to medium brown, not brown-black. If the dough sticks, it’s usually because the griddle isn’t at the right temperature. Use your digital thermometer to test the griddle, and adjust temp. Clean the rings after use if they have dough stuck to them.
SERVE
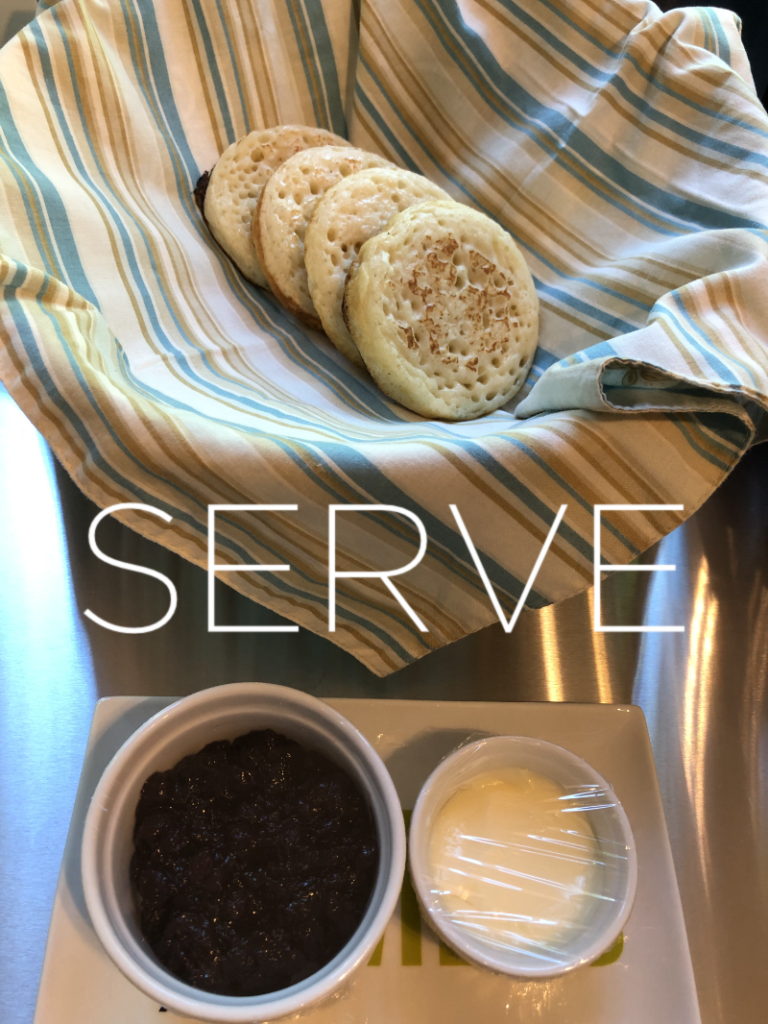
Serve with Kerrygold’s softened butter spread, and an assortment of jams. If storing for later use, let cool fully at room temp for an hours before bagging and putting in the refrigerator. Store in the refrigerator for up to two weeks (They won’t last that long!).
† While the photos will show my old steel coated tin rings, I’ve moved on to a set of Norpro non-stick rings They’re not much more, they are a lot easier to clean, and they need less oils, reducing calories a bit.


