A Six Minute Trip FROM MAINE TO KEY WEST VIA KANSAS
There are a lot of easy home runs for breakfast that don’t take a lot of work. You can improvise quickly just combining great flavors on hand!
Here we take an already wild Maine blueberry English muffin from Wolferman’s and key up its wild side a smidge.
The Irish, particularly Kerrygold, make the best, sweetest, nuttiest butter. With a little sweet citrus of the key lime marmalade, and a rich sharp bite from Kerrygold’s Dubliner cheese, you get a lot of mmmouthfeel fast.
Slice the cheese in advance and leave it in a container, and you can make these on the go out the door to work PDQ!
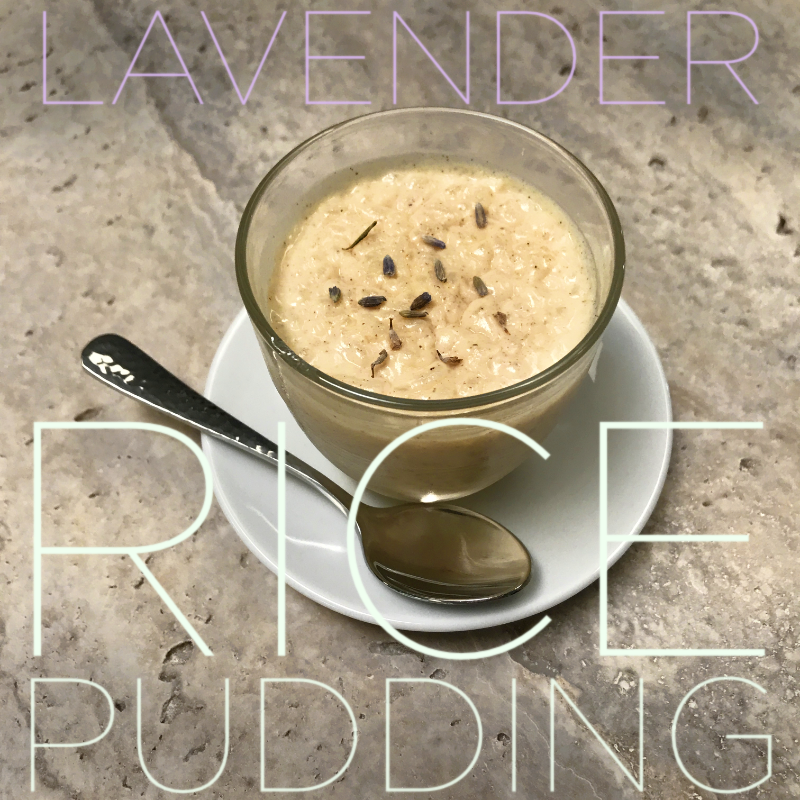
Rice pudding that sings? If you don’t think rice pudding is just grandma’s soupy or gooey glop, try this luscious lavender infused version made with a little science, better sugars, and soul, and you’ll stop singing the blues!
WHY “LADY DAY?”
Amazing dishes need amazing honorees. Billie Holiday, “Lady Day” was a jazz singer beyond elegant, sensual, soulful.
Yes, there are a million rice pudding recipes. Baked. Boiled. Steamed. Million of moms and even celeb chef ones. I’ve been through a ton of them. The problem with pretty much all of them? You make them without thinking about the ingredients, or understanding the “whys” that will free you from boxed Jell-O and let you improvise your own pudding pièce de résistance:
Most of the rote recipes that I’ve read or cooked rely on the easy-happy of fats, and don’t honor the aromatic ingredients or the basic, simple chemistry of pudding in the way that they’re prepared.
American Pudding 101
Puddings are not magic. They’re thickened milk, with sugar and flavorings in them. Not much mystery in the making.
What makes them magic are the flavors and any textures that you add. Rice is a texture. Flavors, like a high quality vanilla, cinnamon, and, here a little culinary lavender, are better than just adding fats, more cream in this case, as a happy. They make you smile, without making your waist line expand. Likewise, using pre-made rice that’s been washed and had the excess starch removed lightens up the pudding dramatically.
Puddings are pretty easy to create perfectly if you don’t overcook them. How they thicken is what separates the bland box from the wonderful wow. Instead of bogging them down with starches that make them gooey, go lighter in texture and richer in mouth feel:
The incredible egg! It’s rich! It’s strong! It binds and lifts!
As we’ve talked about with perfect eggs, the proteins in both whites and yolks bind together with our temperature mantra:
68/154 gives your eggs a little more.
Yolks are 50% water. So, as Hervé This points out in Molecular Gastronomy, 68°C or 154°F is where the water in the egg cooks out with enough time for the proteins to build and bind to make them light and wonderful. We can let it get a bit hotter, but if we want to maintain that light consistency, we have to avoid destroying them.
That presents us with a challenge:
The Pudding Paradox
The ideal temperature to create puddings without boiling them to goo or mush is 170°-172°F/76°-78°c, about 18°F/10°c more than where our “binder” eggs, do their best work. How to fix that?
Meet Cream of Tartar (CofT). Yes, that jar of white stuff mocking you from your aromata or spice rack!
You bought it for that scone or other recipe that called for it, but you really have no idea what it does. Truth!
Cream of tartar helps the proteins in eggs and milk, among other things, solidify better at higher temperatures, without becoming rubbery or tough.
In an American pudding, we have eggs. We have milk. We need them thicker. We need a bit more heat… Hmmm… Cream of Tartar!!
Read my piece on it, It’s about to rock your world here by making one of the most delicate and flavorful puddings that will come out of your pots!
USED RICE
Rice pudding is best as a follow-up to a rice served for a meal, where you either have a couple of cups left over, or you add a couple to your meal prep to make the following day.
If you use a rice cooker, the best way, just make sure that the rice stays moist overnight by adding a little water, a tablespoon or so, and stirring it in before you close up your rice cooker for the night. Anyone who has used a rice cooker for a long time knows this trick to keep rice for 2-4 days.
You can refrigerate the rice overnight, but if you do, then reheat it on 50% in the microwave with a tablespoon of water prior to using in this recipe to warm it through. Warmed or reheated, the preservation of moisture in the grains of rice keep the cooking time short enough to maintain the heat at the levels we want for the eggs.
PREPARE “NEW” RICE RIGHT
If you cook rice in advance for this dish, rather than use leftovers, always wash any jasmine or basmati rice rice 3-4 times in water before starting to cook it. Don’t use heavily starchy rice. It will affect how this light dish comes together. If you have setting for “Firmer” then use that. It will approximate rice that’s been sitting 24-40 hours in a rice cooker.
DO NOT USE PARBOILED, corner cutters. It is not built well for this kind of recipe because you can’t control the starches in a rice that often is “treated” as its parboiled to not stick, and locks in starches that release oddly when put into a low-temp pudding.
THE EVER-PRESENT RAISIN DEBATE
I would suggest you try this without. For you raisin-at-all-costs rice pudding fiends, though, this pudding’s lavender gives it a very delicate aroma and taste. Raisins have a pop of their own, and certainly you can sub out the lavender for them. If you want to dare to do both, might I suggest using currants, champagne-grape sized raisins, instead? 1/4 cup in a glass measuring cup, covered to just over the top of them with water, popped into the microwave for two minutes BEFORE you start your prep and allowed to cool/absorb. Then strain off the liquid and keep it for up to seven days. (It’s great in teas, mixed alcoholic drinks, and more as a flavoring.)
LACTOSE-FREE SUBSTITUTIONS
If you use Fairlife whole milk, the only lactose-free milk that I’ve used that isn’t disgusting, and Organic Valley‘s lactose-free half & half instead of the cream, you still get amazing results.
Serves: 8
PREP & COOK TIME: 15 – 20 Minutes with pre-made rice; 60-90 minutes with rice cook
Ozeri Digital Scale wet ingredients and dry ingredients work bowls (Zero/Tare weight of bowl) OR:
2 Cup/.5 Liter Measuring Cup
1/3 Cup Dry Measure
Measuring spoon set (US)
Small tasting spoons for stirring and a couple for taste checks.
Soup ladle
HOW-TOS
Have your rice warm and at the ready, Thermapen out because temperature control is everything here.
Measure the cream of tartar and set aside.
Measure your dry ingredients by metric weight into your dry ingredients work bowl (ideal) or with spoons (US)
Separate two egg yolks into the mini glass prep bowl, and lightly beat together with a tsp of water. (Reserve the whites by cracking the egg over a storage container to use for another recipe or a nice omelette another day.)
Put the saucepan on the stove, and set to low (gas) med/low (Electric 2-3); Add the milk, cream, vanilla extract and your dry ingredients workbowl. Everything EXCEPT the rice, egg yolks and cream of tartar.
Whisk together. Your Saigon cinnamon will float a bit even after whisking. This isn’t unusual.
When the ingredients reach 68°c/154°F, whisk in the egg mixture with the spatula. Scrape out the container with the raw egg yolk for any leftover with the spatula. Whisk in.
Add the warm rice and stir with your spatula to integrate. (If you add cold rice, wait for the mixture to return to 68°c/154°F.). Whisk periodically making sure to scrape the bottom, edges and sides so nothing starts to stick.
Take the cream of tartar. Using your fingers, pinch off bits and sprinkle it over the top of the rice in the pot. Whisk in.
Stir periodically, scraping the bottom so it does not burn. As the temperature rises, it will begin to thicken 5-8 minutes on gas, a bit longer for electric. When the temp reaches 170°-172°F/76°-78°c and is thickening up nicely, take off the heat.
Ladle into the small serving cups or a larger container. sprinkle with a touch of cinnamon and/or 6-8 lavender buds each. Put in the refrigerator to set for at at least two hours or until fully chilled. Cover with plastic wrap or serve.
Red velvet is one of those American cakes that has always attracted me so much. That dark red, combined with cream white, is just two colors I often use, even at home. Her gloomy appearance, soft and moist, made me mouthwash. In addition, its colorful and vibrant appearance immediately attracts the attention of children, and their delight.
It’s a pretty simple dessert, which can be prepared the day before, does not require much work but has a great visual effect.
Let’s talk about the cream filling. I love it! Simple, economical, but delicious! I often use homemade whipped cream for other desserts, to dress cakes or as frosting on cupcakes. It pairs well with the cocoa in the red velvet.
This icing is very handy to use, because it keeps its shape well, and can be used with a piping bag to create different decorations. The version that is made in Italy does not have the butter, but uses the whipping cream and mascarpone cheese. In the United States you might use a spreadable cheese like cream cheese or goat cheese.
On the web, I’ve seen so many types of red velvet, but I love to play a bit with new and original interpretations in my desserts. For this cake I am improvising off a recipe by Peggy Porschen, where there are a few clear steps to be respected, but I decided not to make the classic cake. I really liked the idea of creating a single serving for a lunch with friends.
Conventional wisdom, and my grandmother, say that the way to a man’s heart is through his stomach, and I must say that it is often the case. I find them perfect for a romantic dinner, to impress my companion.
Here are my irresistible little red pies! Two bites of goodness.
Serves 10
MISE-EN-PLACE
Work bowl and hand mixer, or mixer with whisk and beater attachments
Note: If you prepare it the day before you can still keep it in the fridge, wrapped in food film. The excess can also be frozen, dividing the diskettes with a baking paper sheet and wrapping them in the film.
Cover the bottom of a large low-sided baking tray with parchment paper. Set aside.
With an electric mixer blend the softened butter with the sugar and vanilla extract, until the mixture is light and fluffy.
Lightly blend an egg and add half of it to the butter and sugar mixture, then add one tablespoon of flour taken from the total dose. When the egg is absorbed add half the remaining egg, along with a spoonful of flour.
Dissolve the red dye in the buttermilk. If you want a more intense red, you can add more food color in another step.
Mix half of the butter into the buttermilk mixture with the mixer at medium speed.
While mixing, in a separate bowl, integrate the cocoa and flour together. Stop the mixer, and add half of the cocoa-flour mix into the mixer bowl. Mix slowly to medium speed. When the cocoa-flour mixture is well integrated, add the remaining milk and the other half of the cocoa-flour mix.
In a small non-reactive (non-metal) bowl, mix the vinegar and the bicarbonate to form a foam. Add it to the dough immediately. This is the time to add more red food dye if you want to intensify the color.
In your parchment-lined baking tray, pour out the mix until 3/4 full. If necessary, you can divide the dough into several trays.
Bake in a hot oven at 340°F for about 20-25 minutes. Cool completely.
Flip the pan over on your work surface and gently remove the baking paper.
Using your 2″ biscuit cutter, cut three rounds for each cake.
FILLING (VERSION 1)
In a cold bowl, mix the mascarpone cream and sugar until it is smooth and thick compound. Do not mix too much, otherwise it will become granular.
Store in a container in the refrigerator for at least an hour to set.
FILLING (VERSION 2)
Mix mascarpone, cheese and sugar.
Using an electric whip to mount the cream and add the cream of mascarpone gently mixing from bottom to top.
Store in a refrigerator covered with food film for at least an hour to set.
ASSEMBLY & DECORATION
Place the top disks on a tray. Sprinkle with pearl sugar. Set aside.
Place the decorative tip on the pastry bag. Fill up the pastry bag with the filling.
Lay out the bottom layers.
Pipe on the cream.
Put on the middle layer.
Pipe on the cream.
Place the top layer with the pearl sugar on. Pipe on some of the cream. Top with a couple of fresh raspberries.
La red velvet è una di quelle torte americane che mi ha sempre attirato tantissimo. Quel rosso scuro, abbinato al bianco della crema, sono proprio due colori che uso spesso, anche in casa. Il suo aspetto goloso, morbido e umido, mi faceva venire l’acquolina in bocca. Inoltre, il suo aspetto colorato e vivace attira subito le attenzioni dei bambini, e la loro golosità.
E’ un dolce abbastanza semplice, che si può preparare il giorno prima, non richiede molto lavoro ma ha un grande effetto visivo.
Ma parliamo della crema, io la amo! Semplicissima, economica, ma deliziosa! E’ una crema molto comoda da usare, perché mantiene bene la forma, e la si può usare con la piping bag per creare diversi decori. La versione che si fa in Italia non ha il burro, ma utilizza la panna da montare e il mascarpone, o anche un formaggio spalmabile. Io la uso spesso anche per altri dolci, per ricoprire le torte o come frosting sui cup cake. Sta benissimo abbinata al cacao.
Sul web ho visto tanti tipi di red velvet, ma io amo interpretare in modo nuovo e un po’ originale i miei dolci, così ho deciso di non fare la classica torta. Mi piaceva molto l’idea di creare delle monoporzioni, da servire a un pranzo con degli amici. Così eccole qua, queste mini tortine rosse irresistibili. Due bocconi di bontà. Le trovo perfette anche per una cenetta romantica, per stupire il proprio compagno. La saggezza popolare (e mia nonna), dice che l’uomo si prende per la gola, e devo dire che spesso è proprio così.
Per questo dolce ho usato la ricetta di Peggy Porschen, in cui i passaggi da rispettare sono pochi ma chiari. La ricetta originale prevede l’uso del latticello, che però in Italia non si trova. Quindi ho indicato anche la procedura per fare il latticello in casa, è molto facile.
Per la cream cheese suggerisco due varianti. Una con solo panna e mascarpone, e un’altra, per gli amanti di un gusto più “cheese”, con l’aggiunta di un formaggio spalmabile (ad esempio il Philadelphia).
Per 10 persone
Cosa serve
Una ciotola o un mixer per impastare
Un taglia biscotti rotondo da 5-6 cm
Una sac a poche
Una bocchetta per sac a poche
Spatole o cucchiai per mescolare
Una frusta elettrica per montare la panna
Un contenitore per montare la panna
Una o due ciotole per mescolare
Impasto della torta
150 g di zucchero Zefiro
60 g di burro morbido Parmareggio
1 uovo grande biologico
130 g di latticello
1 cucchiaino e mezzo di colorante in gel rosso Hilton, o colorante in polvere naturale fino al raggiungimento di un bel rosso intenso/scuro
1 cucchiaio raso di cacao amaro (circa 9 g) Cameo
138 g di farina 00 Molino Chiavazza
mezzo cucchiaino di bicarbonato
mezzo cucchiaino di aceto bianco Ponti
mezzo cucchiaino di estratto naturale di vaniglia
Con le fruste elettrice montare il burro morbido con lo zucchero e l’estratto di vaniglia, fino ad ottenere un composto chiaro e spumoso.
Sbattere leggermente un uovo e aggiungerne metà al composto di burro e zucchero, poi unire un cucchiaio di farina preso dalla dose totale. Quando l’ uovo è stato assorbito aggiungere la metà di uovo rimanente, insieme a un cucchiaio di farina.
Sciogliere il colorante rosso nel latticello. Se desiderate avere un colore più intenso potrete aggiungere altro colorante successivamente.
Unire metà latticello al composto di burro, con le fruste a velocità media.
Setacciare insieme cacao e farina e aggiungerne metà alla preparazione. Quando è ben amalgamato completare con il latticello restante e l’altra metà del mix di cacao e farina.
In una ciotolina mischiare l’aceto e il bicarbonato, si formerà una schiumetta, e aggiungere subito all’impasto. Se necessario unire altro colorante alimentare.
Rivestire una teglia bassa e larga con carta forno e versatevi sopra il composto in uno strato alto circa un dito. Se necessario potete dividere l’impasto in più teglie.
Cuocere in forno già caldo a 338°F per circa 20/25 minuti. Fare raffreddare, capovolgere su un tavolo e togliere delicatamente la carta da forno.
Ritagliare con un taglia biscotti da 5-6 cm o un coppapasta rotondo, per ottenere 3 dischetti per ogni tortina.
Se lo preparate il giorno prima potete conservalo ancora intero in frigorifero, avvolto da pellicola per alimenti. L’eccedenza può anche essere congelata, dividendo i dischetti con un foglietto di carta forno e avvolgendoli nella pellicola.
Latticello
63 g di yogurt magro Yomo
68 g di latte parzialmente scremato Granarolo
mezzo cucchiaino di succo di limone
Mischiare tutti gli ingredienti insieme in una ciotola e far riposare mezz’ora a temperatura ambiente.
Cream cheese con mascarpone e panna (version 1)
125 g di mascarpone Granarolo
125 g di panna fresca Granarolo
40 g di zucchero a velo Zefiro
Montare in una ciotola fredda la panna insieme al mascarpone e allo zucchero, fino a renderlo un composto liscio e montato. Non montare troppo, altrimenti diventa a granelli duri.
Cream cheese con mascarpone, panna e formaggio (version 2)
80 g di formaggio spalmabile tipo Philadelphia
90 g di mascarpone Granarolo
150 g di panna fresca Granarolo
50 g di zucchero a velo Zefiro
Mischiare mascarpone, formaggio e zucchero.
Con una frusta elettrica montare la panna e aggiungere la crema di mascarpone mescolando delicatamente dal basso verso l’alto.
Conservare in frigo coperto con pellicola per alimenti
Decorazione
5-10 lamponi freschi
20 perline di zucchero
Composizione
Riempire una sac a poche con la cream cheese, scegliere una punta rigata o liscia, come più vi piace. Io ho usato una bocchetta rigata.
Posizionare un primo dischetto di torta su un piattino da dessert, farcire con 7 ciuffetti di crema partendo dal bordo e terminando con un ciuffetto centrale.
Sopra questi ciuffi di crema posizionare il secondo disco di torta e ripetere la procedura, creando con la sac a poche altri 7 ciuffi di crema.
Sopra questo ultimo strato di crema poggiare il terzo e ultimo dischetto di torta.
Spolverare con poco zucchero velo, decorare con altri due ciuffetti di crema (uno più grande e uno più piccolo), e completare con lamponi freschi interi o tagliati a metà, e perline di zucchero (o cuoricini di zucchero).
Conservare in frigorifero fino al momento di servire.
Why would I call this riff on my house popcorn a bribe (baksheesh)? Everyone who cooks for a family knows that there are a few things that will win over that person stuck doing chores or honey-dos that aren’t always ‘fun.’ The other meaning of the word is a tip for service, so, this is my attaboy for those unsung household jobs that need doing by someone.
A little Berbere spice and black truffle oil make this oh so nice. My Jazz Chef’s Hellza’Poppin’Popcorn blend a low-hull, super tasty midwestern blend, but you can use pretty much any good corn seed out there.
One nice use of this sultry popcorn, other than snacking, is to put a tablespoon or two into small cups to serve as an amuse-bouche before a meal.
Blend the salt and seasonings together in your seasoning dish. Crush the fenugreek leaves and drop in. Stir together with a small spoon and set aside.
Place the popcorn in the Whirley-Pop and add avocado oil (If using an oil popper). Close the lid;
Set the heat to medium, or slightly under. Overheating will scorch the popcorn.
Using the crank, turn the popcorn. You don’t have to crank hard. A nice steady, medium-slow speed will help keep it turning which keeps it cooking evenly and lowers seed loss;
When the popping begins, stir as long as you can. When there is resistance, stop.
Pour the popcorn into your large workbowl.
Spray with the avocado spray. Sprinkle with popcorn seasoning. Grab the bowl with both hands and “flip” the popcorn by pulling the bowl up and inside towards you rapidly. Spray the popcorn coming up from the bottom and season again with the rest of the seasoning. Toss
Drizzle the truffle oil, just enough to give it fragrance, not make it heavy or greasy. Toss.
Serve.
Perché dovrei usare questo popcorn improvvisato fatto in casa per corrompere? Chiunque cucini per la propria famiglia sa che ci sono poche cose che renderanno i lavori domestici meno noiosi e più dolci, come mangiare qualcosa di buono subito dopo. In altre parole è una mancia per il lavoro svolto, la mia ricompensa per quelle faccende di casa noiose che qualcuno deve svolgere.
Un po ‘ di spezie Berbere e un olio al tartufo nero rendono questo popcorn così buono! Io uso il mio mix Hellza’Poppin’Popcorn di Jazz Chef, una miscela molto gustosa del Midwest, ma è possibile utilizzare praticamente qualsiasi buon chicco di mais.
Oltre che mangiarlo come spuntino, un’ altra buona alternativa per consumare questo popcorn è quello di metterlo in piccole ciotoline da servire come aperitivo prima dei pasti.
Ingredienti
60 g circa del mix per popcorn Jazz Chef Pops Poppin’Corn
1 ml di olio di avocado Ottavio, o un olio simile con alto punto di fumo (Perché l’olio di avocado? IN)
Olio di avocado spray (o altro olio di sapore neutro)
10 g di sale
una spruzzata di olio di tartufo nero
5 g di miscela berbera
da 3 a 4 foglie di fieno greco (o utilizzare un pizzico di polvere di fieno greco)
Mescolare insieme il sale e le spezie. Schiacciare le foglie di fieno greco e aggiungerle. Mescolare insieme con un piccolo cucchiaio e mettere da parte.
Mettere il popcorn nella macchina per popcorn Whirley-Pop o, se si usa una padella, aggiungere l’olio di avocado, farlo scaldare e unire i popocorn. Chiudere con il coperchio.
Cuocere a fuoco a medio, o poco più basso. Troppo calore brucerebbe i popcorn.
Se si usa la macchina da popocorn, con la manovella, ruotare i popcorn. Non è necessario farlo velocemente. Una velocità costante medio-lenta andrà bene. Questo mantiene una cottura uniforme e ottimale.
Quando inizia a scoppiettare, continuare a utilizzare la manovella fino a quando non schiocca più. Quando c’è resistenza, fermarsi.
Se invece si usa la padella i chicchi di mais cominceranno a scoppiettare. Non aprire il coperchio, aspettare che gli schiocchi siano distanziati ogni 7-8 secondi, poi spegnere.
Versare il popcorn in una grande ciotola. La Whirley-Pop ha una porta sul lato sinistro che per aprirsi va sollevata. Se la porta è bloccata, utilizzare la manopola sulla porta per liberarla.
Spruzzare con lo spray avocado. Condire con metà mix di spezie e sale. Prendere la ciotola con entrambe le mani e mescolare i popcorn tirando la ciotola rapidamente verso il proprio corpo rapidamente, in modo da farli saltare leggermente per aria. Spruzzare altro olio di avocado sul popcorn che prima era sul fondo della ciotola, cospargere con la metà rimanente del mix di sale e spezie e mescolare di nuovo.
Irrorate con l’olio al tartufo, quanto basta per dare fragranza, non lo rende pesante.
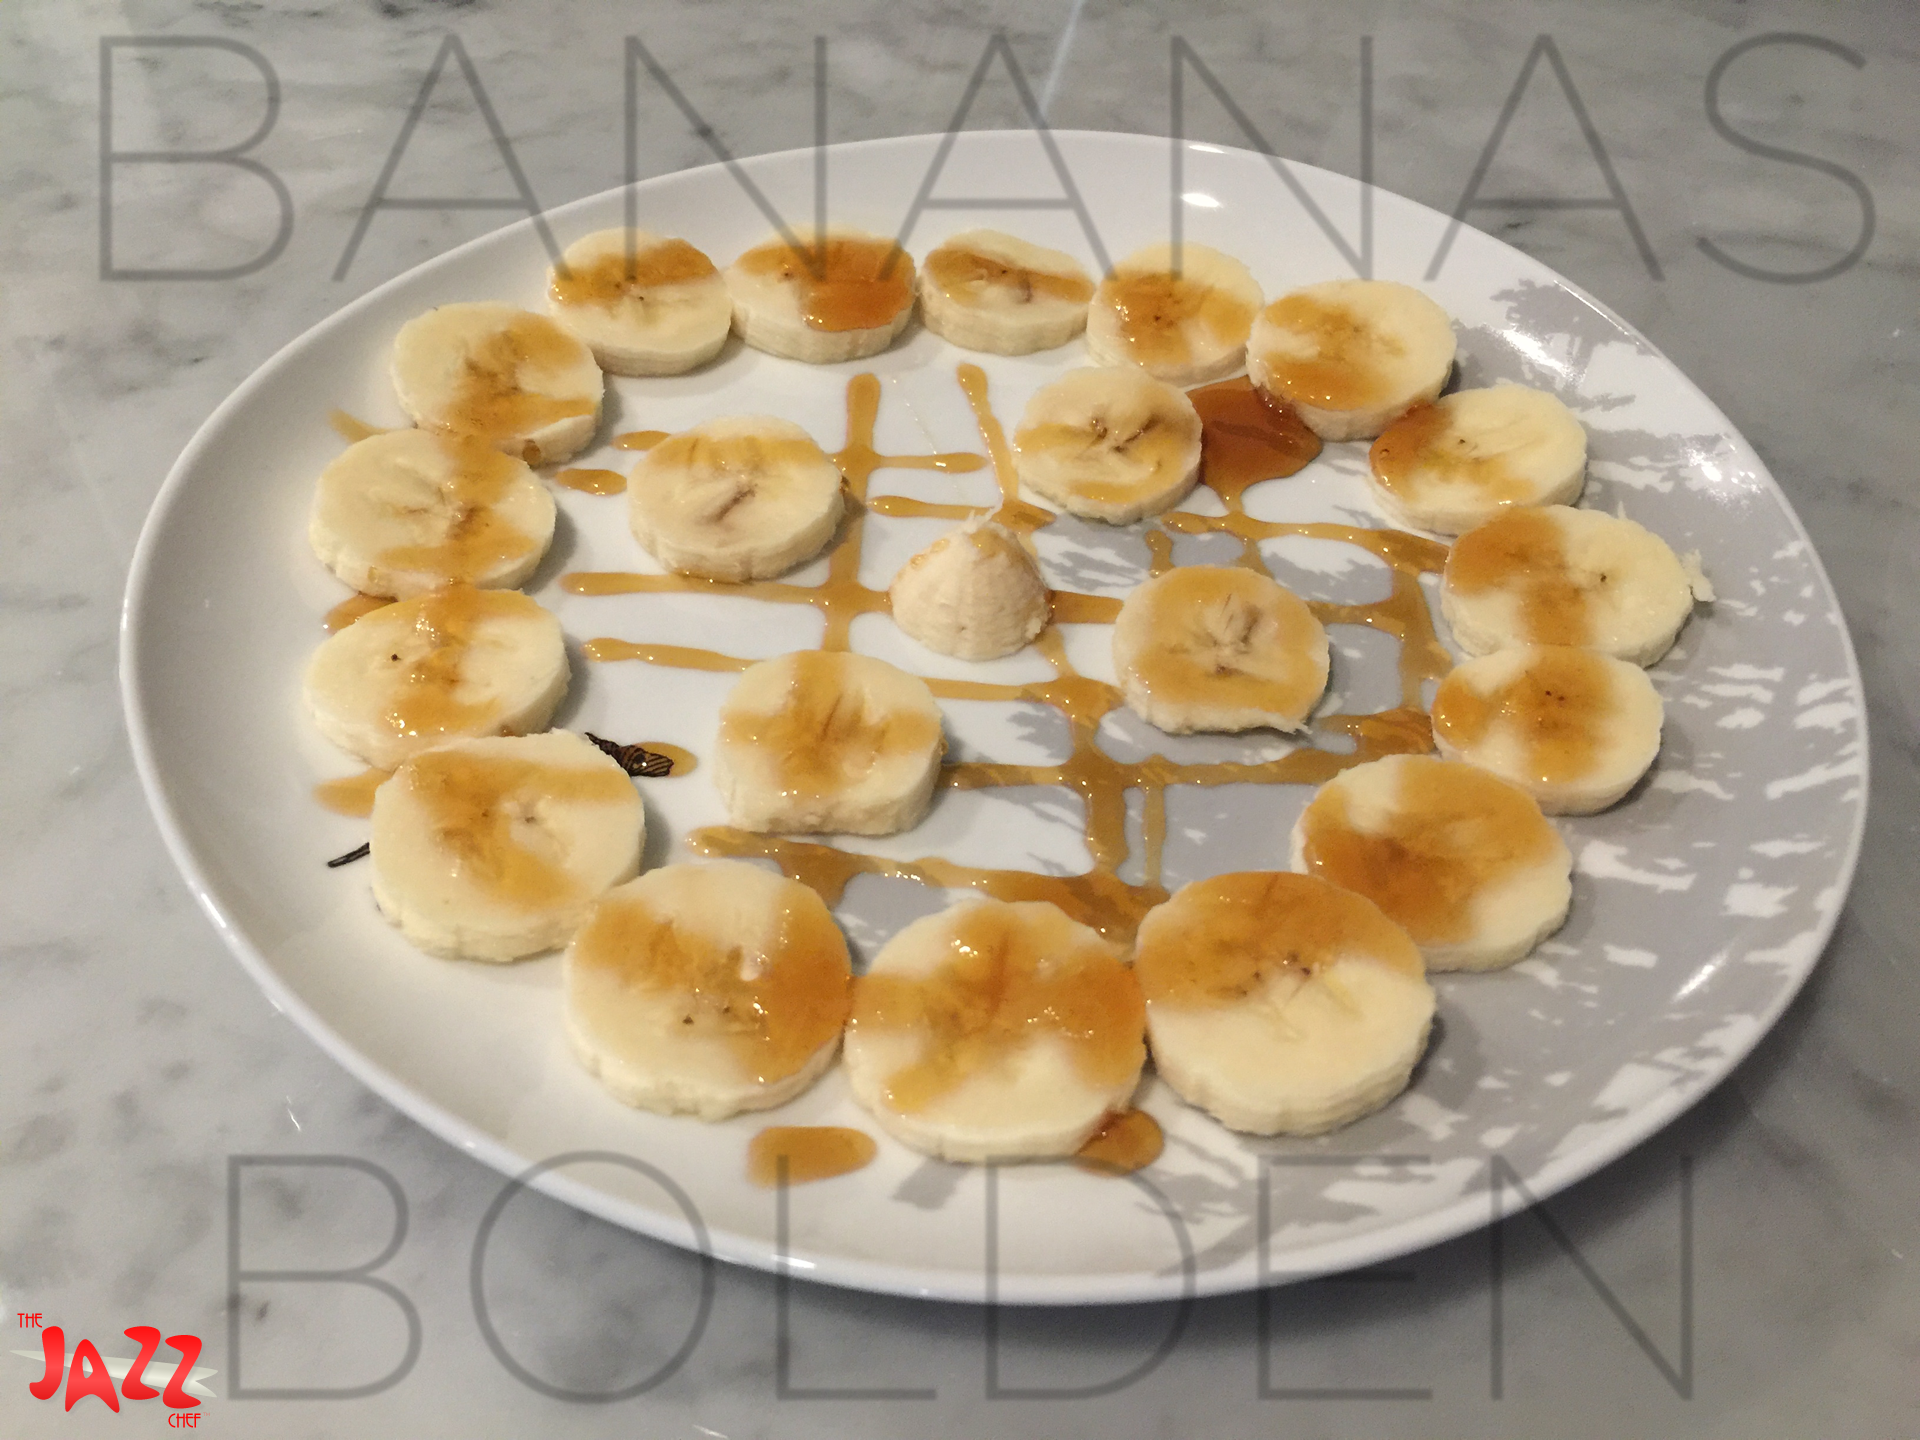
A nice, easy banana snack or dessert named after one of the first greats of Jazz, Buddy Bolden.
Bananas covered with honey aren’t anything new. Just ask anyone in any part of Asia or Latin America.
The riff here the honey to leverage tastes that amp the bananas. I use mangrove honey, produced in several places but pretty common here in Florida and along parts of the Gulf Coast to Louisiana. I pair it with rich chestnut honey, which is a bit more pricey as the majority of it is Italian, but it’s a wonderful taste in small quantities.
The rest is an exercise in good presentation. The plate is your canvas. How are you going to paint it?
The recipe scales up easily. As it is geared to be a snack, it’s set up as a single serving.